

Thursday, 6 December 2012
Even More Tools
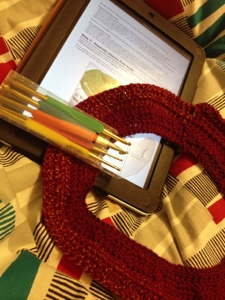
Kollage has moved their square needle manufacturing to USA. I love their new pointier tips. And when I saw they have collaborated on stitch red with Jimmy Beans Wool, I got DPNs in all available sizes.
Tuesday, 4 December 2012
More tools
I am loving my new Hamanaka double sided crochet hooks. They have great ergonomic triangular handles and fantastic pointy tips.
I got these from Stitch Diva studios in California, USA.
I got these from Stitch Diva studios in California, USA.
Thursday, 8 November 2012
New tools
Just received this in mail today. New tools to add to my toolbox. Can't wait to get started with a few projects. Waiting to complete a few test knits before that. More DesiLoop designs coming up too.
Thursday, 25 October 2012
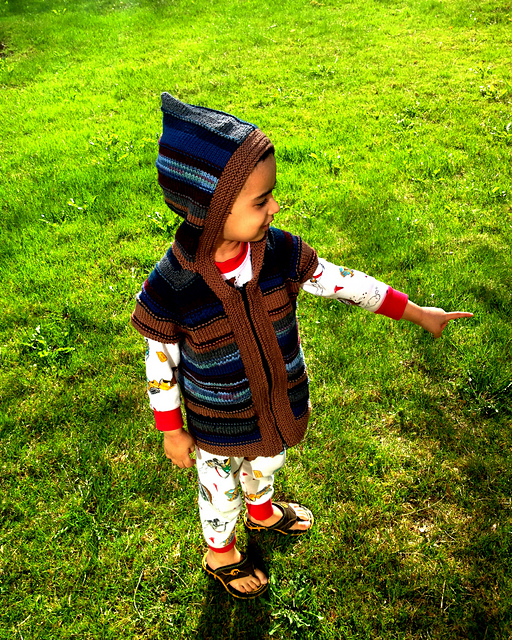
Testing call for new design - Contiguous Sweater (Baby and Child versions)
I have found out over the various years of knitting that it is very simple to get neat ribbed bands in contrast colors. The trick is to always knit the first row(or picked up row) on the public side of your knitting fabric.

BTW, the above sweater is the child version of my latest design that is currently in testing on ravelry. You can sign up to test for
Test is open till Nov 30th, 2012, after which the pattern will be available in the above versions, covering sizes 3mths to 16T.
------------------------------------------------------ © DESILOOP
Thursday, 3 May 2012
Make Snag Free Knitting Stitch Markers
After reading about and being intrigued by how one comes up with a snag free stitch marker, and after trying my hand at making a few myself, I am proud to say that I have been able to decipher it. Here is how I did it.
Materials:


If you end up using this tutorial, I would appreciate a link back to this post.
Happy Knitting!
------------------------------------------------------ © DESILOOP
Materials:
- Beading Wire (preferably Nylon Coated)
- Your choice of main beads
- Crimping beads
- Wire cutter
- Crimper tool
Instructions:
Step 1: Gather your supplies

Step 2: Cut equal lengths of beading wire for how many stitch markers you want to make. I cut 3.5" (around 9 cms). You can cut shorter or longer depending on the drop you want.
Step 3: Take one piece of beading wire and fold it in half (don't hard bend the curved end) to feed in a crimping bead, followed by your desired main bead/s, followed by another crimping bead


Step 4: Using the crimping tool, crimp the last crimp bead put in, right at the edge of the folder wire


Step 5: Push all the other beads towards the crimped bead and crimp the first crimp bead to lock everything in place

That's all you need to do and you are done.
Here are some of mine.


If you end up using this tutorial, I would appreciate a link back to this post.
Happy Knitting!
------------------------------------------------------ © DESILOOP
Wednesday, 18 April 2012
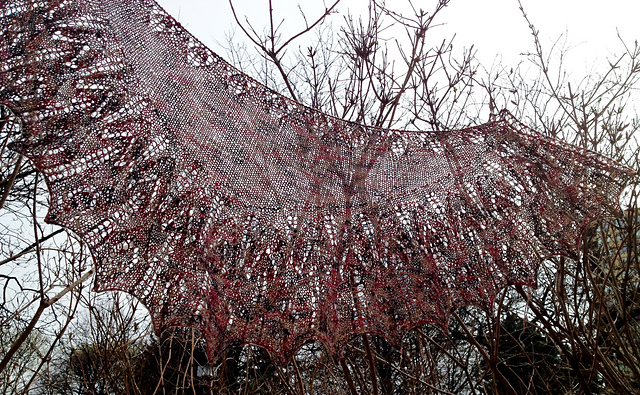
Cause a picture is worth a thousand words...
Since the last update I have
- Released a pattern & got a few tested
 |
| Happily Ever After Beanie |
- Tested few patterns for fellow designers
 |
| Smocked Headwrap by Elisa Joy |
 |
 |
| Mercedes |
 |
| Mini Marguerite cardigan |
 |
| Treefort Jacket |
 |
| Teleidoscope Tam |
 |
| Hera |
- Sewed a lot of things and the ones I am most proud of till date
 |
| Straight edged Wedge tote |
 |
| Travel Duffel for cousin |
- Released my patterns' store on my blog as well
 |
| DesiLoop Store |
- Tried a few more ways of making bling
 |
| Snag free Stitch Markers |
 |
Snag Free Stitch Markers |
- Revised a few of my previously released patterns
- Made a baby shower set for my beloved friend and boss
 |
| Part of Happy Baby Set (Pattern coming soon) |
- Posted a help video...
to support one of my previously released pattern
 |
| Garam Masala Tunisian Cowl |
- Tried to enjoy as many moments with my family as I can
- Thanked the lord more than ever for blessing me
Friday, 30 March 2012
Hook and Needle Conversion Reference
I wanted to share this hook and needle conversion information for your reference.
------------------------------------------------------ © DESILOOP
|
Yarn Crochet Hooks
|
||
|
Metric
|
USA
|
UK
|
|
2.00 mm
|
-
|
14
|
|
2.25 mm
|
1 / B
|
13
|
|
2.50 mm
|
-
|
12
|
|
2.75 mm
|
C
|
11
|
|
3.00 mm
|
-
|
11
|
|
3.25 mm
|
D
|
10
|
|
3.50 mm
|
4 / E
|
9
|
|
3.75 mm
|
F
|
-
|
|
4.00 mm
|
6
|
8
|
|
4.25 mm
|
G
|
-
|
|
4.50 mm
|
7
|
7
|
|
5.00 mm
|
8 / H
|
6
|
|
5.50 mm
|
9 / I
|
5
|
|
6.00 mm
|
10 / J
|
4
|
|
6.50 mm
|
10 1/2 / K
|
3
|
|
7.00 mm
|
-
|
2
|
|
8.00 mm
|
-
|
0
|
|
9.00 mm
|
15 / N
|
00
|
|
10.00 mm
|
P
|
000
|
|
15.75 mm or 16mm
|
Q
|
-
|
|
Thread Crochet Hooks
|
||
|
Metric
|
USA
|
UK
|
|
.6 mm
|
14
|
6
|
|
.75 mm
|
13
|
-
|
|
.70 mm
|
12
|
5
|
|
.8 mm
|
11
|
-
|
|
1 mm
|
10
|
4
|
|
1.15 mm
|
9
|
-
|
|
1.25 mm
|
8
|
3
|
|
1.50 mm
|
7
|
2.5
|
|
1.6 mm
|
6
|
-
|
|
1.7 mm
|
5
|
-
|
|
1.75 mm
|
4
|
2
|
|
1.85 mm
|
3
|
-
|
|
1.95 mm
|
2
|
-
|
|
2 mm
|
1
|
1
|
|
2.25 mm
|
0
|
00
|
|
3 mm
|
00
|
-
|
|
Knitting Needles
|
||
|
Metric
|
USA
|
UK
|
|
2.00 mm
|
0
|
14
|
|
2.25 mm
|
1
|
13
|
|
2.50 mm
|
|
|
|
2.75 mm
|
2
|
12
|
|
3.00 mm
|
|
11
|
|
3.25 mm
|
3
|
10
|
|
3.50 mm
|
4
|
|
|
3.75 mm
|
5
|
9
|
|
4.00 mm
|
|
8
|
|
4.25 mm
|
6
|
|
|
4.50 mm
|
7
|
7
|
|
5.00 mm
|
8
|
6
|
|
5.50 mm
|
9
|
5
|
|
6.00 mm
|
10
|
4
|
|
6.50 mm
|
10.5
|
3
|
|
7.00 mm
|
|
2
|
|
7.50 mm
|
|
1
|
|
8.00 mm
|
11
|
0
|
|
9.00 mm
|
13
|
00
|
|
10.00 mm
|
15
|
000
|
------------------------------------------------------ © DESILOOP
Wednesday, 29 February 2012
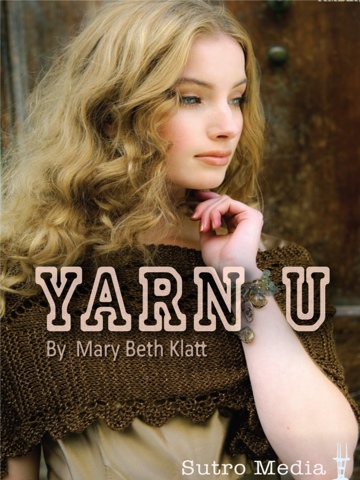
Yarn U App Review
Sometime back I was approached I review an iPhone/iPad app. Although this review is a bit late but I did not want to rush it. Meanwhile I have been using the app quite a bit and it has proved to be very useful.
The app is called Yarn U and it is available through the Apple app store . This app is quite a reference for popular yarns available today. (am sure more information is added and will keep getting added over time about more yarns.
The app is developed by Mary Beth Klatt who is a yarn collector and has written another app called Yarn U for sewing enthusiasts.
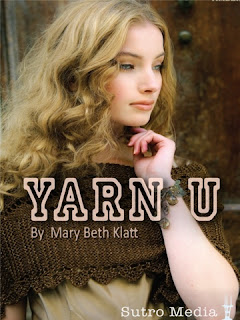
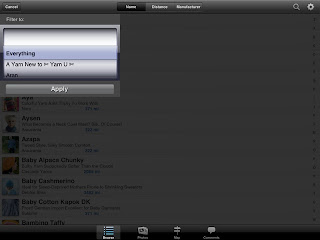
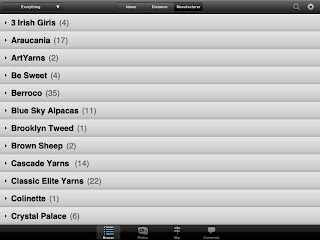
There are a number of ways to navigate the app. Simply through the table of contents, alphabetical index of yarns by name or yarn company, or filter by yarn weight. To get started there is a small manual for the app users built into the app.
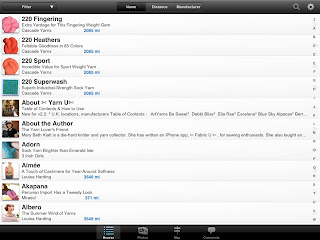
Upon clicking on a yarn you can read a little review of the yarn, get information on its yarn company, weight per ball/ skein, stitch gauge, fiber content and yardage, pros and cons of the yarn and it's care instructions. You can even see its price an leave additional comments for the yarn. There are also a few links to project pictures and patterns that use this yarn.

Another great feature I found was that if you allow the app to use your location, it also gives you the address of the nearest store where you can buy it. However this feature is currently available only for USA based location. There are also pointers on an area map for nearest locations to buy the yarn.
All in all it is an app with a great potential and already very useful. Head over to the apple store and download it today.
The app is called Yarn U and it is available through the Apple app store . This app is quite a reference for popular yarns available today. (am sure more information is added and will keep getting added over time about more yarns.
The app is developed by Mary Beth Klatt who is a yarn collector and has written another app called Yarn U for sewing enthusiasts.
There are a number of ways to navigate the app. Simply through the table of contents, alphabetical index of yarns by name or yarn company, or filter by yarn weight. To get started there is a small manual for the app users built into the app.


Another great feature I found was that if you allow the app to use your location, it also gives you the address of the nearest store where you can buy it. However this feature is currently available only for USA based location. There are also pointers on an area map for nearest locations to buy the yarn.
All in all it is an app with a great potential and already very useful. Head over to the apple store and download it today.
Wednesday, 15 February 2012
PATTERN RELEASE - Perfect crocheted beanie.
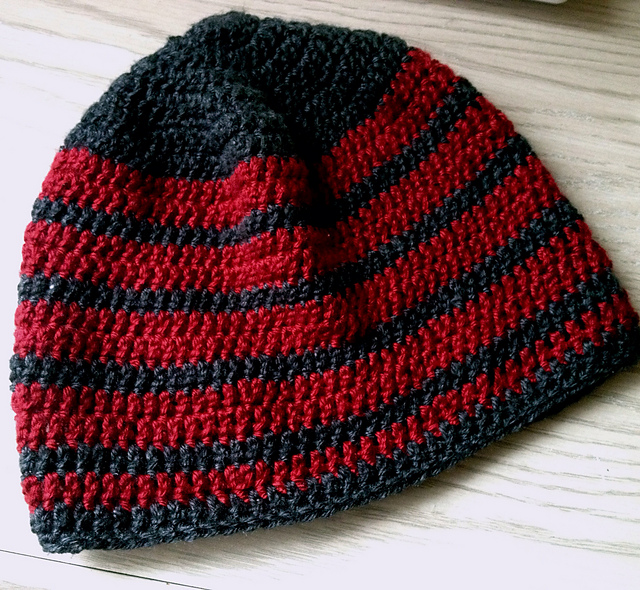
The following is my recipe for making this hat for my DH.
Perfect Crocheted Beanie
Introduction:
There are a number of variations possible for this hat. Make it with one or many colors but it will fit perfectly each time.
Please note, that for changing a color, work till 2 sts remain on the previous st to where color change needs to be done. Then use a loop of the new color to draw through both these loops. In every round, beginning ch 3 counts as first double crochet.
Materials:
Worsted / 10 ply (9 wpi) yarn, Approx. 150yds required
US G/ 4.0 mm Crochet Hook
Sizes Available:
One Size (Adult) (Fits Small, Medium and Large Heads well)
Beanie is 8.5" tall and has a circumference of 19"
Gauge: 17dc and 10 rounds in 4"x 4" (10cm x 10cm)
Abbreviations:
- Chain - ch
- Slip Stitch - sl st
- Stitch/es - st/s
- double crochet - dc
- beginning - beg
- round/s - rnd/s
- repeat - rep
- increase - inc
- single crochet - sc
- previous - prev
- double crochet 2 together - dc2tog
- Ch 3.
- Sl st into the first ch.
- Ch 3, 11 dc into the space formed in the ring from prev step. Sl st into the top of the beg ch 3. (Total 12 sts)
- (Ch 3, dc) into the same st from prev rnd, *2 dc into the next st from previous rnd. Repeat (rep) from * around and join with sl st into the top of the beg ch 3. [12 sts increased (inc) - Total 24 sts]
- (Ch 3, dc) into the same st from previous rnd, dc into the next st, * 2 dc in the next st, dc in the next st. Rep from * around and join with sl st into the top of the beg ch 3 [12 sts inc - Total 36 sts]
- (Ch 3, dc) into the same st from previous rnd, dc into the next 2 sts, * 2 dc in the next st, dc in the next 2 sts. Rep from * around and join with sl st into the top of the beg ch 3 [12 sts inc - Total 48 sts]
- Rep in the pattern above, inc a st between each inc, till there are 84 sts in a rnd.
- Next crochet 8 rnds in dc.
- Next rnd ch3 in the first st, dc into the next 4sts, dc2tog into the next 2 sts, * dc in the next 5 sts, dc2tog into the next 2 sts. Rep from * around and join with sl st to the top of the beg ch 3. [12 sts dec - Total 72 sts]
- Next crochet 4 rnds in dc.
- Next ch1, crochet 1 rnd in sc. Sl st to beg ch1, fasten off and Weave in Ends.
The hat takes only about half an hour to an hour to make up.
Tuesday, 31 January 2012
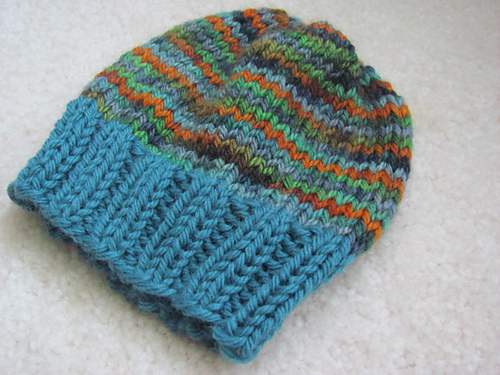
Free Pattern - Coming Home Baby Hat


Abbreviations:
K Knit
P Purl
K2tog Knit 2 stitches together
P Purl
K2tog Knit 2 stitches together
Requirements: Sock or Worsted Weight yarn
4 dpns or circular needles in appropriate size.
4 dpns or circular needles in appropriate size.
Main Body of Hat
Row 1: Cast on a multiple of 4 stitches. I cast on 64 stitches using sock weight yarn and 48 stitches for worsted weight yarn.
Row 2 - 10 : K2 P2 around
Row 11: K all around
Repeat row 11 till the size is enough to cover the head of the baby. (About 4.5 inches/ 11.5cms)
Next row start crown shaping.
Crown Shaping for Sock Weight Yarn
Row 1: K8, K2tog
Row 2: K around
Row 3: K7, K2tog
Row 4: K around
Row 5: K6, K2tog
Row 6: K around
Row 7: K5, K2tog
Row 8: K around
Row 9: K4, K2tog
Row 1: K8, K2tog
Row 2: K around
Row 3: K7, K2tog
Row 4: K around
Row 5: K6, K2tog
Row 6: K around
Row 7: K5, K2tog
Row 8: K around
Row 9: K4, K2tog
Crown Shaping for Worsted Weight Yarn Follow steps from Row 5 of Crown shaping for sock weight yarn.
Finishing Cut the working yarn leaving a 6 inch tail. Thread this through a tapestry needle and sew through the remaining stitches on the needles while taking them off the needle. Pull through and secure top. For added finishing sew a pom pom to the top of the hat.
Here are some finished projects made by others.

Here are some finished projects made by others.


------------------------------------------------------© DESILOOP
Subscribe to:
Posts (Atom)