Saturday 25 July 2009

Where I join Generation - T

I stumbled upon this today. Yeah, I know... where have I been, not to hear of this phenomenon. Well now that I have seen her I decided I am going to join Generation - T as well. So I took hubby's old T-shirt
And did this to it.

I was so so so happy with the result that I had to pause and think... why didn't I come up with this idea. All of us have the same brain, how come we end up using it so differently. How come such obvious things escape us. Finally I am glad there are people like Megan Nicolay who are there to remind us.
Here is what I did.
I cut along the red lines in the picture below.

I also cut the bottom hem to use it as a tie cord.
Next I folded the top of front and back and hemmed them.
I cut the bottom hem turned tie cord at one of the side seams and put it through the front and back top hem. And there it is, the T-shirt transformed into my favorite summer top. Yay !!!

--------------------------------------------------------
© YARNSIDE (More details at end of page.)

Sunday 12 July 2009

Baby Sweater Coat.

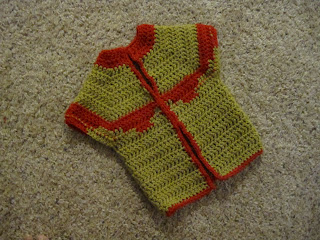
I made a sweater coat for my son a while back.


I kinda liked the outcome and wanted to make another one with the same recipe... Today was the day.
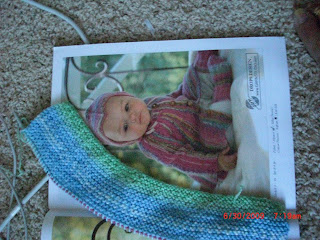
I was itching to make something that will be quick and give me instant gratification, since I have been working on this A-Line baby coat for a while and it almost seems never ending... why?... it's in garter stitch. I don't know what I was thinking. Anyhow... I think once its done... i.e. when its done... its going to look great. And that is another day. :)
The design is from Drops online and I really love the looks of the finished piece in the picture. The only difference between that and my version is that I am not making full sleeves. I am making this for my niece in India and since it does not get too cold there, I figured a short sleeve would be just fine.
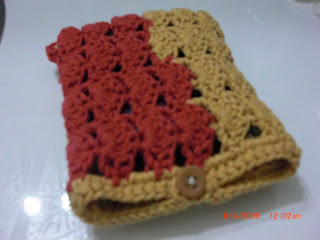
Coming back to the second version of my sweater coat recipe. It is made of Vanna's Choice solids in yummy pea green and scarlet red colorways. I just need to add a button and it's done. All so quick.

So, I thought it is worth it to share the recipe on the blog.

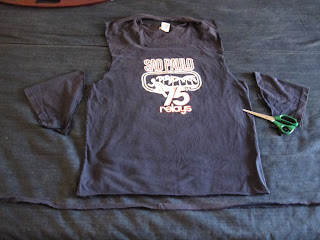
I used a J hook with Vanna's choice solids. Construction is a top down raglan.
Idea was to have four segments when starting the garment. Two for the left and right arms, and the other two for the back and front. Depending on the guage, make a foundation of a no. of stitches that is a multiple of four, plus minus a couple of stitches to get a good distribution. I made a double foundation chain of 38 stitches. Just to make the distribution even. Since this is a cardigan, the front stitches need to be halved into left and right fronts. My second project on this has short sleeves, but they can be easily extended to become full sleeves.
dc= double crochet
shell = three dc in the same stitch OR 1dc, 1 chain, 1dc in the same stitch (used to make raglan increases.

* To begin, make a double foundation of 38, chain 2, turn.
* dc in the same stitch as the chain 2 and in each stitch across.
* repeat above
* Now to start the raglan increases I divided the 38 stitches like below:
- 4 dc (left front) + 1 increase stitch + 8 dc (left sleeve) + 1 increase stitch + 10 dc (back) + 1 increase stitch + 8 dc (right sleeve) + 1 increase stitch + 4 dc (right front)
* The next few rows I made 1 dc in each segment stitch(front/ back/ sleeves) and 1 shell in each increase stitch, until the depth of the raglan increases is as desired.
* Next I joined the sleeve beginning and end to close the sleeve openings.... so 1dc in the first dc of the beginning shell and in the last dc of the end shell either side of the sleeve stitches. From there on just 1 dc in each stitch across for the desired length of the coat.
For finishing I just single crocheted all round.
All Done !
Possibilities for variations are endless. I just made two of them :)
--------------------------------------------------------
© DesiLoop

Thursday 2 July 2009

More Random Gifts

The camera cozy that I posted last, was made for Stephanie and she has received it now. She told me it is just perfect - just what she wanted. :) Well, that was just a part of what I sent over to our NY office.
There was this for my boss.
She loves red. And the moment I saw this pouch in China Town, I had to pick it up for her.
I had already made this little guy ( a small pouch to keep your change in) for her.
And this I had to pick up for her. Its a cellphone pouch.
This for one director, it was his birthday in 3 days and I like him a lot, so I thought this should be a good cozy for his IPOD.
and this for another director's daughter. So many random gifts were already in my mind. This also came up.
Also, this for my colleague's baby to be. She is due in September if I remember right.
Finally this for another colleague. One triangle and two square coasters.
And all of this was triggered by Stephanie's promised camera cozy.
Oh and I just forgot... here is a cozy I made for our GPS.
--------------------------------------------------------
© YARNSIDE (More details at end of page.)

Sunday 7 June 2009

Stash Buster Camera Cozy

I remember when I had made my Thrifty Camera Cozy and taken it to office, one of my colleagues Stephanie had asked me to make one for her too. I promised to make her one instantly and even started one in pink. However, I did not like how it turned out so I frogged it. Later on with the turn of events, it so happened that now its been a year, I have moved to California from New York and Stephanie still doesn't have what was promised. Finally, now, after a year, I realized her birthday is coming up, so I am going to gift her a cozy.

I just randomly came up with this design while playing with some stash cotton ease. Love how it turned out so I went ahead a wrote a pattern for the same. It can be found here on Ravelry. Direct Download Here


In other new it feels great and encouraging to see more projects of my designs.

Crocheted Headband

Garnet

Hoping to see more soon.

Plus I have added two more crochet tutorial videos to my Youtube Channel. I hope you find these useful.


Monday 1 June 2009

I went to Maker Faire

Warning: Photo heavy post.

All the while we were in NY/ NJ I used to read blogs about the fun people had at the Maker Faire and wondered if I would get a chance to see it.
Well this weekend was my chance and I made sure I used it. I dragged everyone at home along with me... MIL, FIL, Hubby and Baby :D and we all had great fun.