Wednesday, 18 April 2012

Cause a picture is worth a thousand words...

Since the last update I have
  • Released a pattern & got a few tested
Happily Ever After Beanie
  • Tested few patterns for fellow designers
Smocked Headwrap by Elisa Joy
Mercedes
Mini Marguerite cardigan
Treefort Jacket
Teleidoscope Tam
Hera
  • Sewed a lot of things and the ones I am most proud of till date
Straight edged Wedge tote
Travel Duffel for cousin
  • Released my patterns' store on my blog as well
DesiLoop Store
  • Tried a few more ways of making bling
Snag free Stitch Markers
Snag Free Stitch Markers

  • Revised a few of my previously released patterns
  • Made a baby shower set for my beloved friend and boss
Part of Happy Baby Set (Pattern coming soon)
  • Posted a help video... 

to support one of my previously released pattern

Garam Masala Tunisian Cowl
  • Tried to enjoy as many moments with my family as I can
  • Thanked the lord more than ever for blessing me
------------------------------------------------------ © DESILOOP

Friday, 30 March 2012

Hook and Needle Conversion Reference

I wanted to share this hook and needle conversion information for your reference.


Yarn Crochet Hooks
Metric
USA
  UK  
2.00 mm
-
14
2.25 mm
1 / B
13
2.50 mm
-
12
2.75 mm
C
11
3.00 mm
-
11
3.25 mm
D
10
3.50 mm
4 / E
9
3.75 mm
F
-
4.00 mm
6
8
4.25 mm
G
-
4.50 mm
7
7
5.00 mm
8 / H
6
5.50 mm
9 / I
5
6.00 mm
10 / J
4
6.50 mm
10 1/2 / K
3
7.00 mm
-
2
8.00 mm
-
0
9.00 mm
15 / N
00
10.00 mm
P
000
15.75 mm or 16mm
Q
-


Thread Crochet Hooks
Metric
USA
  UK  
.6 mm
14
6
.75 mm
13
-
.70 mm
12
5
.8 mm
11
-
1 mm
10
4
1.15 mm
9
-
1.25 mm
8
3
1.50 mm
7
2.5
1.6 mm
6
-
1.7 mm
5
-
1.75 mm
4
2
1.85 mm
3
-
1.95 mm
2
-
2 mm
1
1
2.25 mm
0
00
3 mm
00
-


Knitting Needles
Metric
USA
  UK  
2.00 mm
0
14
2.25 mm
1
13
2.50 mm


2.75 mm
2
12
3.00 mm

11
3.25 mm
3
10
3.50 mm
4

3.75 mm
5
9
4.00 mm

8
4.25 mm
6

4.50 mm
7
7
5.00 mm
8
6
5.50 mm
9
5
6.00 mm
10
4
6.50 mm
10.5
3
7.00 mm

2
7.50 mm

1
8.00 mm
11
0
9.00 mm
13
00
10.00 mm
15
000


------------------------------------------------------ © DESILOOP

Wednesday, 29 February 2012

Yarn U App Review

Sometime back I was approached I review an iPhone/iPad app. Although this review is a bit late but I did not want to rush it. Meanwhile I have been using the app quite a bit and it has proved to be very useful.

The app is called Yarn U and it is available through the Apple app store . This app is quite a reference for popular yarns available today. (am sure more information is added and will keep getting added over time about more yarns.
The app is developed by Mary Beth Klatt who is a yarn collector and has written another app called Yarn U for sewing enthusiasts.


There are a number of ways to navigate the app. Simply through the table of contents, alphabetical index of yarns by name or yarn company, or filter by yarn weight. To get started there is a small manual for the app users built into the app.


Upon clicking on a yarn you can read a little review of the yarn, get information on its yarn company, weight per ball/ skein, stitch gauge, fiber content and yardage, pros and cons of the yarn and it's care instructions. You can even see its price an leave additional comments for the yarn. There are also a few links to project pictures and patterns that use this yarn.


Another great feature I found was that if you allow the app to use your location, it also gives you the address of the nearest store where you can buy it. However this feature is currently available only for USA based location. There are also pointers on an area map for nearest locations to buy the yarn.

All in all it is an app with a great potential and already very useful. Head over to the apple store and download it today.

Wednesday, 15 February 2012

PATTERN RELEASE - Perfect crocheted beanie.


The following is my recipe for making this hat for my DH.


Perfect Crocheted Beanie


Introduction:
There are a number of variations possible for this hat. Make it with one or many colors but it will fit perfectly each time.
Please note, that for changing a color, work till 2 sts remain on the previous st to where color change needs to be done. Then use a loop of the new color to draw through both these loops. In every round, beginning ch 3 counts as first double crochet.


Materials:
Worsted / 10 ply (9 wpi) yarn, Approx. 150yds required
US G/ 4.0 mm Crochet Hook

Sizes Available:
One Size (Adult) (Fits Small, Medium and Large Heads well)
Beanie is 8.5" tall and has a circumference of 19"

Gauge: 17dc and 10 rounds in 4"x 4" (10cm x 10cm)

Abbreviations:
  • Chain - ch
  • Slip Stitch - sl st
  • Stitch/es - st/s
  • double crochet - dc
  • beginning - beg
  • round/s - rnd/s
  • repeat - rep
  • increase - inc
  • single crochet - sc
  • previous - prev
  • double crochet 2 together - dc2tog
Instructions:
  • Ch 3.
  • Sl st into the first ch.
  • Ch 3, 11 dc into the space formed in the ring from prev step. Sl st into the top of the beg ch 3. (Total 12 sts)
  • (Ch 3, dc) into the same st from prev rnd, *2 dc into the next st from previous rnd. Repeat (rep) from * around and join with sl st into the top of the beg ch 3. [12 sts increased (inc) - Total 24 sts]
  • (Ch 3, dc) into the same st from previous rnd, dc into the next st, * 2 dc in the next st, dc in the next st. Rep from * around and join with sl st into the top of the beg ch 3 [12 sts inc - Total 36 sts]
  • (Ch 3, dc) into the same st from previous rnd, dc into the next 2 sts, * 2 dc in the next st, dc in the next 2 sts. Rep from * around and join with sl st into the top of the beg ch 3 [12 sts inc - Total 48 sts]
  • Rep in the pattern above, inc a st between each inc, till there are 84 sts in a rnd. 
  • Next crochet 8 rnds in dc.
  • Next rnd ch3 in the first st, dc into the next 4sts, dc2tog into the next 2 sts, * dc in the next 5 sts, dc2tog into the next 2 sts. Rep from * around and join with sl st to the top of the beg ch 3. [12 sts dec - Total 72 sts]
  • Next crochet 4 rnds in dc.
  • Next ch1, crochet 1 rnd in sc. Sl st to beg ch1, fasten off and Weave in Ends.
The hat takes only about half an hour to an hour to make up.


Tuesday, 31 January 2012

Free Pattern - Coming Home Baby Hat


The following is my recipe for newborn baby hats. I used this for making a lot of them while I was expecting.
Abbreviations: 
K Knit
P Purl
K2tog Knit 2 stitches together
Requirements: Sock or Worsted Weight yarn
4 dpns or circular needles in appropriate size.
Main Body of Hat 
Row 1: Cast on a multiple of 4 stitches. I cast on 64 stitches using sock weight yarn and 48 stitches for worsted weight yarn.

Row 2 - 10 : K2 P2 around
Row 11: K all around
Repeat row 11 till the size is enough to cover the head of the baby. (About 4.5 inches/ 11.5cms)
Next row start crown shaping.
Crown Shaping for Sock Weight Yarn 
Row 1: K8, K2tog

Row 2: K around
Row 3: K7, K2tog
Row 4: K around
Row 5: K6, K2tog
Row 6: K around
Row 7: K5, K2tog
Row 8: K around
Row 9: K4, K2tog
Crown Shaping for Worsted Weight Yarn Follow steps from Row 5 of Crown shaping for sock weight yarn.
Finishing Cut the working yarn leaving a 6 inch tail. Thread this through a tapestry needle and sew through the remaining stitches on the needles while taking them off the needle. Pull through and secure top. For added finishing sew a pom pom to the top of the hat.


Here are some finished projects made by others.


------------------------------------------------------© DESILOOP

Friday, 20 January 2012

ANNOUNCEMENT - DesiLoop on Etsy


All DesiLoop Self Published Patterns are now also available to purchase through Etsy.


Please visit DesiLoop on Etsy and add it to your favorites.

Tuesday, 17 January 2012

9 HATS SO FAR !!!!!!!!!

It so happened that I made a hat for my son on November last year but it got lost the next month.

Earlier last year when we landed in Canada, we lost another two hats in the play park nearby. One was mine and one was my son's.

I already felt as if we don't have enough hats and now during winters it certainly was the case. I felt like Dh's hat wasn't fitting him well and son didn't have the right hats with all his outfits. So I decided to dive into my stash and see if I had yarn to make some.

I discovered today that I was not keeping track of how many I made. Looking back starting 2nd January this year, I have completed 8 hats in different sizes to fit all of us. Some basic and some fun...
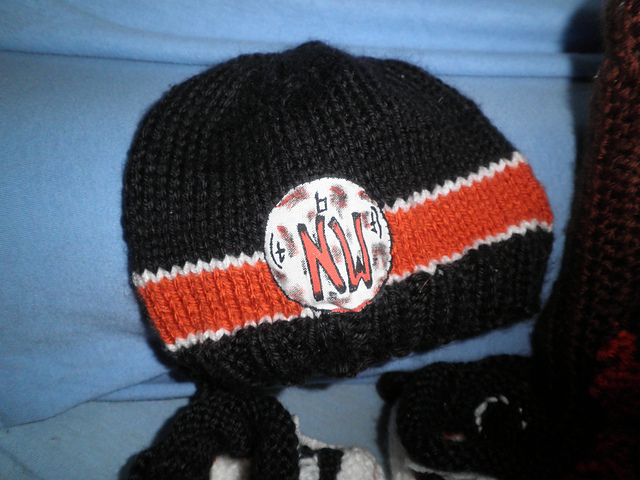
The one below was the first one, worked top down featuring a car motif worked using a combination of intarsia and fair isle techniques. I call it Vroom Vroom Hat (ver 1)

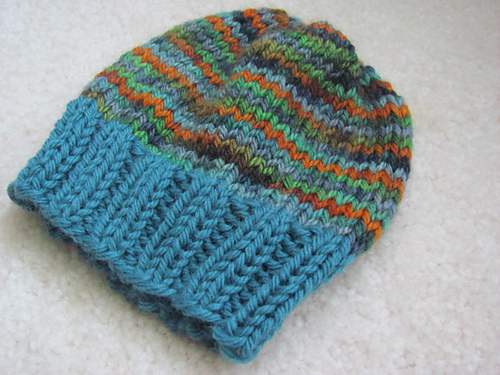
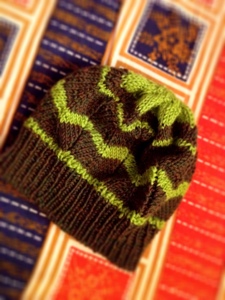
Next came this one... I wanted make my own version of the popular hats these days made of chevron stitch. This one is also worked from the top-down and fits perfectly on my son's little head.

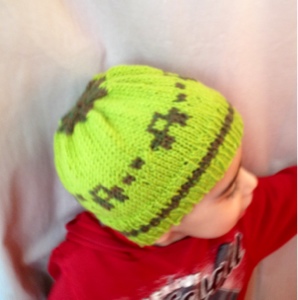
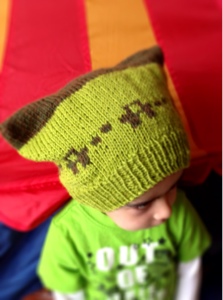
Next I decided son needs a straight hat... So I made another version of the first one. (Vroom Vroom Hat ver 2) but this one was made bottom-up.

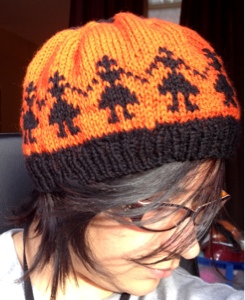
Now it was my turn. It's made using some leftover Cascade 220 from my stash and features a paper dolls motif. This is again made using a combination of fair isle and intarsia. Knit top-down.

Then came another one for son with the same yarns. The same yarn as the hat above and uses jobless joins technique and knit top-down.

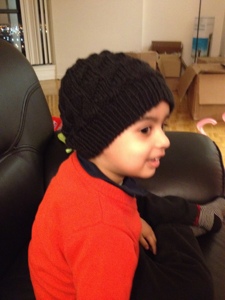
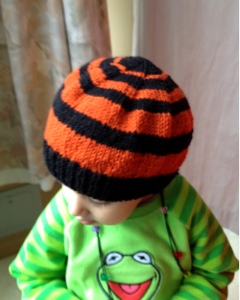
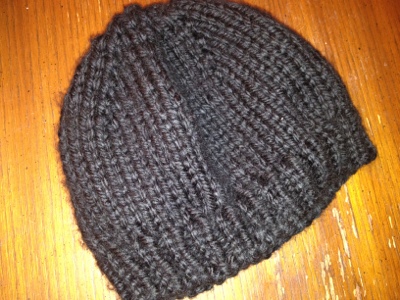
Then a black basic one for son using bulky yarn to keep his ears extra warm in the snow. I think its made of some Lionbrand super bulky wool.

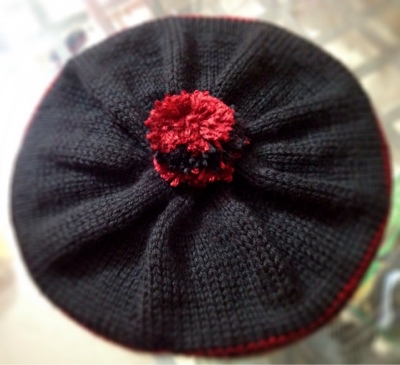
Next a beret for me with some stash yarn. Featuring a pom pom to use up every bit of the stash yarn and again knit top-down (Can you tell yet that I am a fan of top-down projects?)

By this time I realized there was no proper hat for DH. So even though he told me not to make hats for him, I figured I'll still make one so he can wear it while he buys what he likes from a store. ( he is pretty lazy when it comes to shopping... Even for himself.)

His first comment was don't you have a softer yarn... Well I was a bit irritated, but I know he prefers non-itchy yarn that I didn't have at hand. It is completely worked in ribbing from top to bottom and is completely reversible.

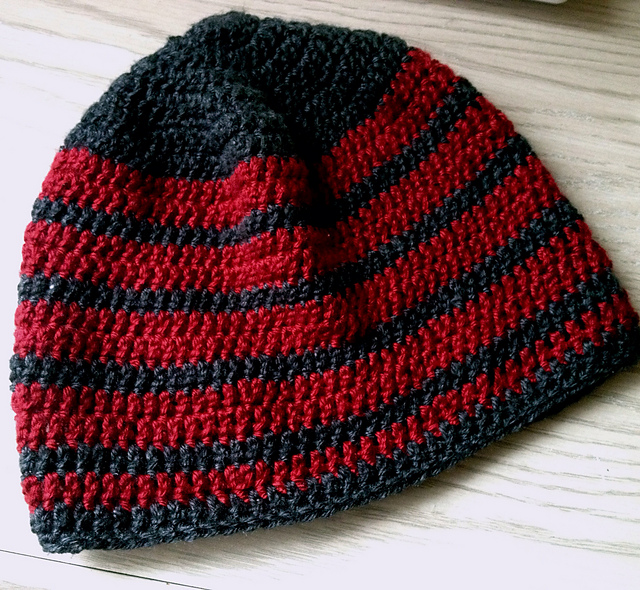
So, I thought of frogging the earlier double knit hat that he likes and make it longer so it can cover his ears. I chose crochet since it is much faster. This yarn is very soft and DH loves this hat as well.

I will be writing up patterns for some of the above hats soon and making them available on my Ravelry store. Stay tuned for more updates.

Wednesday, 4 January 2012

In Sewing Land - 3


Third Project - Straight up triangular Base bag.

I used this tutorial for making this bag, although I completely changed the dimensions. I just wish I could find a two - way zipper near my house somewhere.


Unlike my other bags, I bought the waterproof lining for this bag. However, the exterior is the same curtain fabric I used for Box Bag 1

I made a basic beaded loop and attached it to the zipper head to act as a zipper pull. Its pretty neat!

Contemplating my next sewing project… it will either be another bag (maybe a different shape though) or a set of pajamas for A.

------------------------------------------------------ © YARNSIDE